Are you tired of the stress that comes with driving? One way to transform your driving experience is by enhancing your car’s audio quality—and installing a crossover could be the key. Crossovers significantly improve sound quality, even with lower-quality speakers, by ensuring each speaker handles only the frequencies it’s best suited for.
The key to achieving that optimal sound lies in setting the crossover frequency correctly. But if you’re not sure where to start, don’t worry! In this guide, CartoolsGuide will walk you through the steps to set the ideal crossover frequency for your car audio system, along with essential tips on getting the most out of your speakers.
Read on to learn how to set crossover frequency and bring out the best sound in your car!
What is frequency?
In physics, frequency refers to the number of oscillations or cycles a wave completes in a given unit of time, usually measured in Hertz (Hz). Simply put, it’s the speed at which a wave repeats, with the formula for frequency given by f=1Tf = \frac{1}{T}f=T1, where TTT is the wave’s period.
What is Crossover Frequency?
In simple terms, the crossover frequency is the point where audio shifts from one type of speaker to another, such as from a main speaker to a subwoofer. In this setup, the crossover is an active component that sends specific frequency ranges to the appropriate speaker, allowing each speaker to focus on the frequencies it can best reproduce.
For instance, a crossover filters high frequencies to tweeters and low frequencies to subwoofers, while midrange sounds go to midrange speakers. In passive systems, the crossover works with internal components that direct the sound to various channels, enhancing clarity and balance.
How to Set the Crossover Frequency for Your Car Audio System
1. Determine Your Speaker’s Frequency Range
Start by identifying the frequency range that your car speakers can handle. This range varies based on speaker type, so check the specifications for guidance.
2. Play Music with a Wide Frequency Range
Choose music with a dynamic frequency range to help you pinpoint the ideal crossover frequency. As you play it, listen carefully to assess how each frequency is reproduced.
3. Set the Initial Crossover Point
Begin by setting the crossover frequency at around 10 Hz below the lowest frequency your main speakers can handle without distortion. For example, if your speakers can handle down to 60 Hz, set the crossover to around 50 Hz.
4. Adjust Volume and Listen for Distortion
Gradually increase the volume. If you notice distortion, slightly reduce it until the sound is clear. Make note of this volume setting to help you fine-tune the crossover point later.
5. Lower the Gain on the Subwoofer Amplifier
Set the gain of your subwoofer amp to its lowest setting and turn on the low-pass filter, adjusting it as high as it can go.
6. Play Music and Listen for a Smooth Transition
Play your music again, listening closely for a seamless blend between your main speakers and the subwoofer. Ideally, the bass should integrate with the rest of the sound without noticeable separation.
7. Fine-Tune the Crossover Frequency and Volume
If you notice a bass “bump” or inconsistency, adjust the crossover frequency and fine-tune the volume until the bass blends smoothly with the main speakers.
Following these steps can transform your audio experience, providing well-balanced sound that complements your driving and listening style. Enjoy the enhanced clarity and depth as you cruise!
In Physics frequency is defined as the number of oscillations of a periodic wave that passes through a fixed point in unit time in periodic motion.
Formula of frequency – f=1/T , where T is the period of the sound wave.

How to set crossover frequency for speakers
To set up the crossover frequency for your speakers, it’s essential to understand the specifications of your audio equipment, particularly the frequency response range of your speakers. Here’s a step-by-step guide to help you set the crossover frequency for optimal sound quality.
1. Check Your Speaker’s Frequency Response
Begin by checking the frequency response range on your speaker’s specifications, which might look something like “32-10,000 Hz.” This range tells you the lowest and highest frequencies your speaker can handle effectively.
2. Access the Receiver’s Setup Menu
Use your receiver’s remote to enter the setup menu. Find the section that allows you to configure your speaker’s size and set the crossover point. Navigation may differ depending on your receiver model, so refer to the user manual for specific instructions.
3. Take Note of the Lowest Frequency
Once in the menu, refer back to your speaker’s frequency response and take note of the lowest frequency listed. Most car speakers handle a low end around 30-55 Hz, while subwoofers typically go as low as 20 Hz.
4. Set the Crossover Frequency
In the crossover adjustment menu, set the high-pass crossover frequency. A good rule of thumb is to double the lowest frequency from your speaker’s specifications. For example, if your speaker’s lowest frequency is 40 Hz, set the crossover point around 80 Hz.
5. Understand High-Pass and Low-Pass Crossover Points
- The high-pass crossover point is where the main speakers stop, allowing lower frequencies to shift to the subwoofer.
- The low-pass crossover point is where the subwoofer’s output tapers off, blending smoothly with the main speakers.
6. Fine-Tune for Seamless Sound
For most car speakers, the lowest practical frequency range is around 40 Hz, but it’s often best to set the crossover around 10 Hz above this for a cleaner sound transition. Adjust as necessary for a balanced blend, ensuring the sound doesn’t drop off too low or distort.
By following these steps, you’ll set the crossover frequency to ensure each speaker is performing at its best, resulting in a fuller, distortion-free audio experience.
Choosing the Best Car Audio Crossover
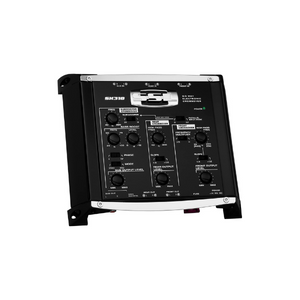
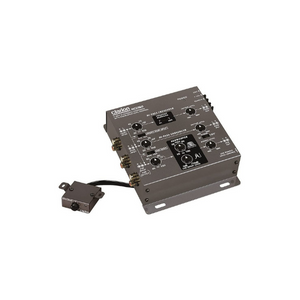
If you’re looking to get the best sound from your car’s audio system, investing in a quality car audio crossover is essential. A good crossover can transform even average speakers, delivering clear, balanced sound across all frequencies.
Key Elements of a Crossover System
When setting up your crossover, there are three main factors that affect sound quality: frequency, slope, high-pass settings, and low-pass settings. Understanding how to adjust each of these will help you fine-tune your audio system for optimal performance.
- Frequency: The crossover frequency determines where different sound ranges are divided between speakers, such as between tweeters and subwoofers.
- Slope: This refers to how quickly frequencies drop off past the set crossover point. Steeper slopes (measured in decibels per octave) provide a sharper cutoff, while gentler slopes allow for more blending.
- High-Pass and Low-Pass Filters:
- High-pass filters block low frequencies from reaching smaller speakers that can’t handle them, letting them focus on mid to high frequencies.
- Low-pass filters limit high frequencies sent to the subwoofer, so it only delivers deep bass.
For those who spend a lot of time on the road, especially professional drivers, knowing how to set these crossover points can make a big difference in the listening experience. Following the crossover frequency guide mentioned earlier, you can learn to adjust each setting to get the best sound.
Enjoying Music on the Go
A quality car audio crossover not only protects your speakers but also enhances sound quality, making every trip more enjoyable. With a well-set crossover, even a standard audio system can deliver impressive clarity and depth.
Conclusion
After reading this guide, you should have a solid understanding of how to set the crossover frequency for your car audio system. If you have any questions, feel free to reach out in the comments section below. Enjoy your upgraded audio experience!


