If you’re searching for “how to install front shocks on a Chevy truck,” chances are your ride no longer feels the way it should. Maybe your truck feels unstable while turning, dips excessively during braking, or delivers a rough, uncomfortable drive on uneven roads. These are all clear signs that your front shocks may be worn out and need replacement.
The good news? You don’t need to rush to a mechanic. With the right tools, quality replacement shocks, and a clear step-by-step guide, you can restore your Chevy truck’s stability, handling, and driving comfort on your own.
You’re in the right place. In this guide, we’ll walk you through exactly how to remove and install front shocks on a Chevy truck, making the process simple, safe, and beginner-friendly. Let’s get started and get your truck back to delivering a smooth, confident ride.
How to install front shocks on a chevy truck
Table of Contents
To install new front shocks on your Chevy truck, the first step is safely removing the old ones. Follow these steps carefully to ensure a smooth and secure installation.
Step 1: Lift the Truck
Begin by lifting the front of the truck using a jack. Raise the front tire 6–8 inches off the ground to give yourself enough working space. Always place the jack on a stable, level surface for safety.
Step 2: Remove the Wheel
Start by removing the lug nut covers. Use a wrench to loosen and remove all the lug nuts, then carefully pull the wheel off, supporting it with both hands.
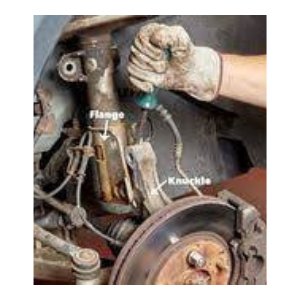
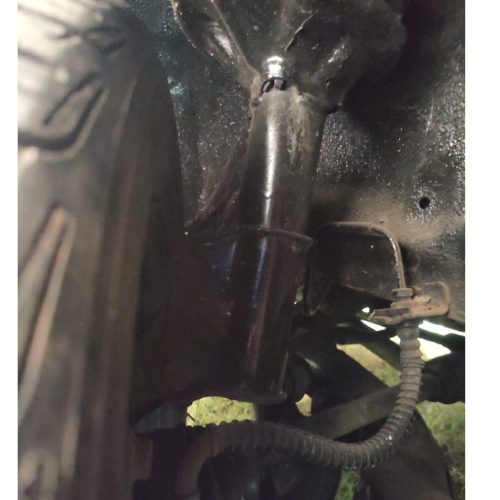
Step 3: Loosen the Shock Bolts
Locate the two bolts securing the shock absorber—one at the top and one at the bottom.
- Begin with the upper bolt. Use locking pliers along with a 15mm ratchet to loosen the nut. Work the ratchet back and forth until the nut breaks free, then remove it by hand.
- Next, move to the lower bolt. Use a 21mm wrench to remove the nuts holding the bottom of the shock in place.
Once both bolts are removed, carefully pull out the old shock absorber.
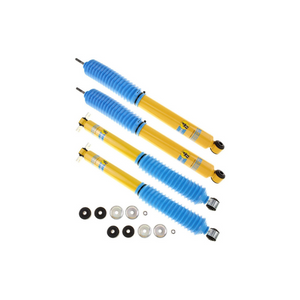
Step 4: Prepare the New Shocks
Before installation, compress each new shock 4–5 times to activate the internal components. Allow 1–2 minutes for the shocks to fully extend back to their normal position.
Step 5: Install the New Shocks
Insert a washer into the bushing and place it onto the frame. Align the bottom of the shock with the mounting point, then insert the bolt from the inside out and hand-tighten the nut. Afterward, place the rubber bushing and washer on the top of the shock.
Step 6: Raise the Suspension
Position a floor jack securely under the control arm and slowly raise the suspension until the shock’s threaded rod passes through the mounting hole.
Step 7: Tighten the Top Nut
Once the threads are visible, tighten the top nut using a 14mm wrench. If the shock spins while tightening, hold it in place with locking pliers and use an adjustable wrench to compress it slightly. Tighten just enough to secure it—avoid over-tightening.
Step 8: Tighten the Bottom Bolt
With pressure still applied to the control arm, tighten the bottom bolt to a torque of 18.4 lb-ft to ensure a secure fit.
Step 9: Reinstall the Wheel
Lower the jack carefully and reinstall the wheel. Tighten the lug nuts evenly, then finish by snapping the lug nut covers back into place.
Now your new front shocks are installed, and your Chevy truck should have improved control and stability!
Read more about – How to replace shock absorber
Conclusion
If you’ve made it this far, you should now have a clear understanding of how to install front shocks on a Chevy truck. Even if this is your first time tackling suspension work, following these steps carefully will help you complete the job safely and correctly.
If any step still feels unclear or you’d like extra guidance, feel free to leave a comment below—I’ll be happy to help. You can also watch the YouTube video linked above for a more detailed, visual walkthrough of removing and installing front shocks on a Chevy truck.
By doing this job yourself, you not only restore your truck’s ride comfort, handling, and stability, but you also save money on labor costs while gaining valuable hands-on experience. With your new shocks installed, your Chevy truck is ready to deliver a smoother, more controlled drive once again.
Do you need to jack up truck to change front shocks?
Yes you need to jack up the truck to change the front shocks.
Can you replace front shocks yourself?
Yes you can replace front shocks by yourselves because in this modern day you can type the word to google how to install front shocks on a Chevy Truck and read 1-2 article to get proper idea about it and then you can do the task by yourselves very easily.
Which way should a shock be mounted?
Your rear shock absorbers should be mounted as far outboard as possible as well, and in as close to perpendicular to the travel of the suspension.