How to Polish A Car with A Buffer is the most effective way to restore your car’s lost shine and achieve a smooth, showroom-like finish. If washing alone no longer removes dullness, stains, or swirl marks, proper polishing is the solution.
Is your car no longer shining like it used to, even after washing and removing water spots? Simple cleaning isn’t enough to bring back your car’s original luster. Over time, sun exposure, oxidation, and environmental contaminants slowly damage your car’s paint, leaving it faded and worn.
To truly revive your car’s finish, polishing and waxing are essential—and the easiest way to do this is with a buffer. A car buffer is an affordable, fast, and beginner-friendly tool that removes oxidation, swirl marks, tar, bugs, acid rain etching, and both light and deep paint damage without harming the surface.
Regular exposure to sunlight and harsh elements can dull your car’s appearance, but buffing restores clarity and gloss, giving your vehicle a fresh, like-new look.
Cartoolsguide will help you understand How to Polish A Car with A Buffer and what to consider before buying one.
While hand polishing can remove very light scratches, it’s ineffective for deeper imperfections. Machine polishing delivers better results in less time and prevents arm fatigue, making it the preferred choice for most car owners.
What to Look for When Buying a Buffer
Table of Contents
Choose a trusted brand with positive reviews. Professionals recommend a speed range of 600 RPM to 3000 RPM. Beginners should start at lower speeds and increase gradually as they gain confidence.
Another key factor is the buffer’s throw, which refers to the size of the orbit during polishing. A larger throw covers more area and works faster but can be harder to control. Make sure the buffer feels comfortable, well-balanced, and not too heavy.
Avoid extremely cheap buffers, as they often fail after minimal use. Investing in a quality buffer ensures durability and better performance. Before full use, always test it on a small damaged section of paint.
Orbital vs Rotating Buffers
For beginners, an orbital buffer is highly recommended. It automatically slows or stops under pressure, making it safer and easier to control. Experienced detailers may prefer rotating buffers for faster correction.
Polishing Pads and Compounds
Polishing requires microfiber pads, also called bonnets. The pad type and compound strength depend on the level of paint damage. Severe damage needs a firmer pad and a more aggressive compound, while lighter imperfections require softer pads and finer polish.
Apply a small amount of compound to the pad and spread it evenly over a 2 ft × 2 ft section before turning the buffer on. Using finer compounds helps reduce the risk of scratching.
On average, 5–6 pads are needed for small cars, while 7–8 pads are ideal for larger vehicles.
With the right buffer, pads, and technique, you can master How to Polish A Car with A Buffer, restore your vehicle’s shine, and protect its paint for years to come
How to polish a car with a orbital buffer
How to Polish a Car with an Orbital Buffer is one of the safest and most effective ways to restore your vehicle’s shine, especially if you’re a beginner. Compared to hand polishing, machine polishing delivers faster results, deeper gloss, and a more even finish—but only when done correctly.
Machine polishing may look simple, but using the wrong technique can damage your car’s paint. That’s why understanding the basics before you start is essential.
Understanding Your Car’s Paint (Important)
Your car’s paint has three layers:
- Primer – the base foundation
- Base Color Coat – gives the car its color
- Clear Coat – the thinnest and most delicate layer that protects the paint
The clear coat is where polishing happens. Over-polishing or applying too much pressure can wear it down, causing permanent damage. This is why beginners should always use a dual-action (DA) or random orbital buffer. These buffers automatically slow down or stop when too much pressure is applied, greatly reducing the risk of paint damage.
How to Polish a Car with an Orbital Buffer (Step-by-Step)
1. Wash Your Car Thoroughly
Before polishing, your car must be completely clean. Any dirt, dust, or debris left on the surface can cause scratches during polishing.
- Use warm water and a quality car wash soap (marine soap works well)
- Wash using a soft sponge or microfiber mitt
- Rinse thoroughly and dry with a microfiber towel
- Inspect the surface to ensure no particles remain
👉 Skipping this step can ruin your paint.
2. Apply Polishing Compound to the Pad
Polishing compound removes light scratches, oxidation, swirl marks, and water spots.
- Choose a polishing compound for light to moderate defects
- Use a rubbing compound only for deeper scratches (seek expert advice if unsure)
- Apply 2–4 small drops of compound to the center of the pad
- Do not spread it manually across the entire pad
Turn the buffer on briefly (5–10 seconds) away from the car to evenly distribute the compound.
3. Start Polishing at a Safe Speed
Before working on visible panels, practice on an inconspicuous area like the trunk lid.
- Hold the buffer firmly using both handles
- Apply light, even pressure—let the machine do the work
- Start at low speed to minimize heat and friction
Recommended RPM range:
- Main polishing: 1750–2400 RPM
- Finishing passes: 1200–1750 RPM
Gradually increase speed only when you’re comfortable.
4. Move the Buffer Slowly and Evenly
Never rush this step.
- Move the buffer in straight, overlapping passes
- Work left to right, then top to bottom for even coverage
- Keep the pad flat against the surface at all times
- Do not stay in one spot too long, as this can burn the clear coat
If swirl marks remain, you can repeat the process with lighter pressure.
5. Polish in Small Sections
For best results, divide the car into 2 ft × 2 ft sections.
- Apply polish to one section at a time
- Complete polishing before moving to the next area
- This ensures consistent gloss and prevents uneven results
Smaller sections give you better control and a more professional finish.
6. Wipe Off Residue
After polishing each section:
- Use a clean microfiber towel
- Gently wipe away leftover polish residue
- Inspect the surface under good lighting
This final step reveals the true shine and smoothness of your paint.
Final Tips for Best Results
- Always use clean pads—dirty pads can scratch paint
- Avoid polishing under direct sunlight
- Don’t rush; patience gives the best shine
- Follow polishing with wax or sealant for long-lasting protection
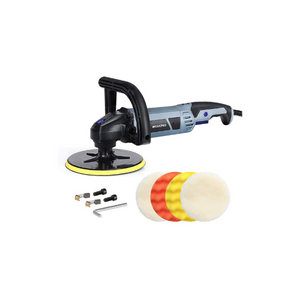
How to polish a car with a rotary buffer
A rotary buffer is a high-powered polishing tool designed to correct serious paint defects such as deep scratches, heavy oxidation, stubborn stains, swirl marks, and paint discoloration. When used correctly, it can restore your car’s paint to a deep, glossy, glass-like finish much faster than a dual-action (DA) polisher.
However, because a rotary buffer spins in one direction at high speed, it requires more skill and control. Unlike DA polishers that move in dual motion, a rotary buffer generates more heat, making it extremely effective—but also riskier if mishandled.
That said, with the right technique and patience, you can safely achieve professional-level results.
Here’s a simple guide to polishing your car with a rotary buffer:
Why Use a Rotary Buffer?
- Removes deep scratches and heavy swirl marks
- Corrects oxidation and severe paint defects
- Delivers faster correction than a DA polisher
- Produces a high-gloss, mirror-like finish
Best suited for intermediate to advanced users
How to Polish a Car with a Rotary Buffer (Step-by-Step)
1. Start at a Low Speed
Always begin at a low RPM to protect your car’s paint.
- Start between 1000–1200 RPM
- Never exceed 1800 RPM
- Increase speed gradually only if necessary
High speeds create heat, which can burn through the clear coat if you’re not careful. Slow and steady is the key to safe rotary polishing.
2. Keep the Buffer Moving at All Times
Never allow the rotary buffer to sit in one place.
- Use slow, controlled passes
- Move side to side or back and forth
- Avoid tight circular motions (they create excess heat)
Constant movement prevents heat buildup and reduces the risk of paint burn.
3. Be Extra Careful Around Edges and Corners
Paint is thinnest on edges, body lines, and corners.
- Reduce pressure in these areas
- Lower the RPM when approaching panel edges
- Avoid aggressive polishing on sharp contours
Many paint failures happen at edges—caution here is critical.
4. Keep the Pad Flat for Maximum Control
Always keep the polishing pad flat against the surface.
- Slightly lift the rear edge if needed to prevent drag
- Never polish on the pad’s edge
- A flat pad ensures even pressure and reduces holograms
This technique helps maintain control and delivers a smoother finish.
5. Finish with Wax or a DA Polisher
After polishing, sealing the paint is essential.
- Apply wax or paint sealant to protect the finish
- Many professionals prefer using a DA polisher for waxing
- You can also apply wax carefully with a rotary buffer if experienced
This final step enhances shine and locks in the correction.
6. Know When to Seek Professional Help
If you’re unsure or lack confidence:
- Choose a dual-action polisher (safer for beginners)
- Or hire a professional detailer for rotary correction
Rotary buffers are powerful tools, and there’s no shame in choosing a safer option.
Pro Tips for Safe Rotary Polishing
- Always work in small sections (2 ft × 2 ft)
- Use clean, high-quality pads
- Avoid polishing under direct sunlight
- Let the machine do the work—don’t force it
How to polish and wax a car with a buffer
Car wax is a thin, soft layer that sits on top of your car’s paint, providing a hydrophobic barrier to protect your car from the elements. It shields the clear coat from UV rays, sunlight, rain, road spray, and more, while giving your car a shiny, glossy finish. Think of it like sunscreen for your car—keeping it protected and looking great!
Applying wax to your car can be done by hand or with a machine. Using a buffer or polisher for waxing is quicker and easier than doing it by hand, especially if you want to save time. If you’re wondering how to wax a car with a buffer, follow these simple steps for a flawless finish:
Materials You’ll Need:
- Liquid wax
- Microfiber towel
- Waxing pad
- Wax removal cloth
- Machine buffer
Step 1: Choose a Shaded Area
Avoid waxing your car under direct sunlight. Wax dries quickly in the sun, which can cause uneven application. It’s best to work in a shaded area, like a garage, where you can control the environment and work comfortably.
Step 2: Wash Your Car
Before applying wax, make sure your car is clean. Wash off any dirt or debris to avoid scratching the paint while waxing. It’s also a good idea to polish your car after washing to ensure it’s spotless, but if you’re in a hurry, just washing will do.
Step 3: Apply the Wax and Buff
- Apply a small amount of liquid wax to your waxing pad.
- Gently apply the wax to your car’s surface, either horizontally or vertically. Avoid using circular motions, as this can cause swirl marks.
- Attach the waxing pad to your buffer and place it gently on your car’s surface. Turn the buffer on to start working.
- Use light pressure and move the buffer steadily over the car, allowing the wax to spread evenly. Glide the buffer across the surface with each stroke, avoiding staying in one spot too long.
Step 4: Remove Residue
Once you’ve finished buffing, check for any leftover wax residue. Use a microfiber towel or wax removal cloth to wipe off any excess and leave your car with a beautiful, shiny finish.
Final Tip:
Machine waxing gives your car a smooth, professional-looking finish much faster than hand waxing. Plus, it provides better protection from the elements, keeping your car looking newer for longer!
By following these simple steps, you can easily wax your car with a buffer and give it a sleek, glossy shine that lasts.
Why should you use Dual Action Polisher to polisher your car?
Hand polishing your car can be time-consuming and often doesn’t give you that showroom-like shine you’re hoping for. So, why not consider using a dual action polisher to achieve a perfect finish?
A dual action (DA) polisher might cost a little more than hand polishing, but it’s worth every penny. It delivers impressive results, providing a smoother, shinier finish and helping you restore your car’s original shine. Unlike a rotary polisher, which can be tricky to handle and requires experience, the DA polisher is safe, user-friendly, and perfect for both beginners and professionals.
Benefits of Using a DA Polisher:
- Removes Swirl Marks and Scratches: It helps eliminate small imperfections like swirl marks and light scratches, giving your car a smoother surface.
- Improves Texture and Luster: A DA polisher enhances your car’s texture, making the paint look vibrant and shiny, much better than hand polishing.
- Safe to Use: Unlike rotary polishers, which can be risky and may cause damage if not used properly, the DA polisher is easy to control and safer for your car’s paint.
However, it’s important to note that a DA polisher won’t repair deep scratches or provide the same level of smoothness and shine as a rotary polisher. But for general polishing, it’s the perfect tool.
If you’re looking for a quick and effective way to make your car’s paint shine without risking damage, a dual action polisher is the way to go.
Difference Between Dual Action Polishers and Rotary polishers
- A Dual Action (DA) polisher is much safer to use than a rotary polisher. While rotary polishers spin in just one direction, they build up heat quickly, which can potentially burn your car’s paint. In contrast, a DA polisher moves in two circular directions, making it much gentler on the surface and ensuring you get a smooth, mirror-like finish without the risk of damaging your car’s paint.
- One of the key benefits of the DA polisher is that it allows you to control the speed. Many DA polishers come with variable speed settings, so you can adjust the speed according to your needs. This flexibility gives you the confidence to polish at your own pace, without worrying about over-heating or burning the paint.
- The DA polisher is excellent for removing minor imperfections, like light scratches, swirl marks, and etching. It restores the shine of your car, leaving it looking glossy and well-maintained for months. Its vibration motion and automatic speed adjustment help make polishing easy and safe, even for beginners. If you apply too much pressure, the machine automatically adjusts to prevent damage, which makes it a user-friendly tool for anyone new to detailing.
- On the other hand, a rotary polisher works faster and can correct more serious imperfections, like deep scratches. However, it requires a skilled hand, as the risk of burning through the paint is higher due to its single-direction spin and higher speed.
- For beginners, a DA polisher is the safest and easiest tool to use. It eliminates small imperfections like scratches and swirl marks while being gentle on your car’s paint. With its automatic adjustments and smooth operation, the DA polisher ensures your car gets the perfect finish, without the fear of making mistakes.
- In short, if you’re just starting out in car detailing, the DA polisher is the perfect choice. It’s safe, easy to control, and still delivers amazing results, while a rotary polisher is best left to experienced detailers.
Best Dual Action Polisher for Beginners
As a beginner, a DA polisher is the best choice for polishing your car. It’s safe, easy to use, and perfect for getting that shiny, glossy finish. However, with so many options available, it can be tricky to choose the right one for your needs.
Different DA polishers are designed for different tasks—some are ideal for flat paint surfaces, while others are built to handle narrow curves, headlights, or other tricky areas. Key features to consider when buying a DA polisher include its speed, weight, throw (the size of the oscillation), and safety features.
It’s important to find a DA polisher that meets your specific needs. You’ll want one that not only provides the perfect shine but also is easy to handle, fits your budget, and works well for the type of car you have.
To help you make the best decision, we’ve compiled a list of popular DA polishers that are loved by beginners. These polishers offer great performance, ease of use, and excellent results, making them the perfect choice for anyone just starting with car detailing.
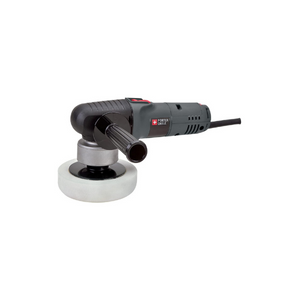
BLACK+DECKER Random Orbit Polisher Review
This Dual Action polisher weighs around 2.05 pounds which is easily lifted and move on your car’s surface. Its ergonomic design with two handles and 10ft long cord will comfort you in polishing.
This polisher is most suitable for beginners as it is featured with 6 variable speed ranges from which you can select your favorable speed and is used for both polishing and waxing. The diameter of polishing wheel is 7 inches that provides you a large throw by which the polishing can be finished fast.
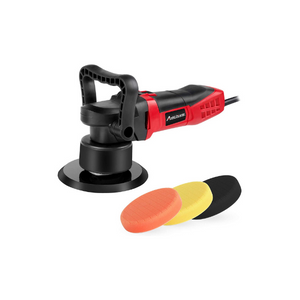
Autocare Car Dual Action Polisher Review
This is also a beginner-friendly dual action polisher which is 5.65 pounds in weight, equipped with 6 variable speed ranges and a detachable side handle for which you will feel easy when polishing. The special feature of this polisher is planetary gear group technology which will give you the best performance with less power consumption and lower noise.
Conclusion
Hope, our website has given all the answer of your queries about how to polish a car with a buffer. I hope after reading this article you are going to enjoy glass like shine from your car.